55 inches wide, 29 inches deep. Those are the photo booth dimensions that matter most for the SmileMore Classic, our enclosed walk-in booth, and they’re smaller than most venue owners expect. For planning, think of a corner about 5 x 5 feet with one standard outlet nearby. The cabinet rolls on casters and fits through a standard door, so most bars, restaurants, cafes, lobbies and shops already have a spot that works. Below is what each measurement means in practice, how much breathing room to leave, and how to choose the right corner.
The footprint in plain numbers
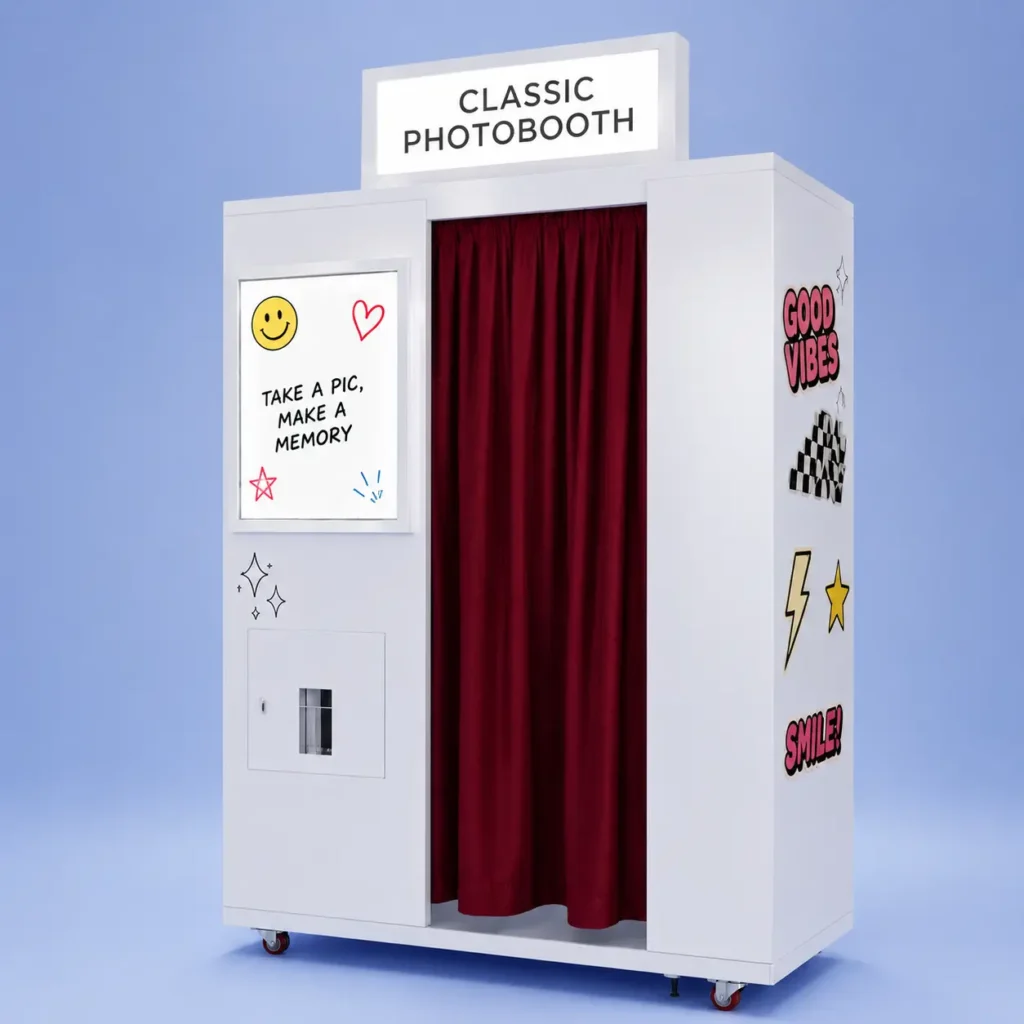
At roughly 55 x 29 inches, the Classic covers about 4.6 by 2.4 feet of floor, a little over 11 square feet. That’s about the size of a small sofa. Inside, there’s a bench, a curtain, a Canon camera, a flash, and a DNP dye-sub printer that turns out two strips in about 90 seconds. On top sits an illuminated topper that helps guests spot the booth from across the room.
The finish doesn’t change the size. Finish choices (white, brushed metal, or a custom wrap with your branding) don’t change the footprint, so you can decide on looks after you’ve settled on location.
Why we plan for a 5 x 5 ft corner
If the cabinet only needs about 11 square feet, why ask for 25? Because a booth is something people walk up to, gather around and wait for, and that activity needs room.
The extra space covers a few things:
- Room in front of the curtain for a group to pile in and out without bumping a table or a bar stool.
- A spot for friends to wait their turn without blocking a walkway, a server’s route or a fire exit.
- Access for our crew to open the cabinet, restock paper and handle repairs without moving your furniture.
- A little air around the cabinet so it reads as a feature rather than something crammed into a gap.
Think of it as the booth’s personal space. A 5 x 5 ft corner is our planning number, not a hard minimum. If your best spot is a bit different, show us and we’ll give you an honest opinion on whether it works. To start that conversation, head to our photo booth hosting page.
Height, ceilings and the topper
Height is the dimension owners forget to ask about, and the topper is the reason it matters. We confirm the booth’s overall height for your specific space during review, so the most useful thing you can do is tell us what’s overhead: low soffits, hanging pendant lights, ceiling fans, signage, a sloped ceiling under a staircase, or a mezzanine edge. A quick photo of the corner from a few steps back usually answers the question faster than a tape measure.
Getting the booth through your door
The Classic’s 29-inch depth is what leads through a doorway. That’s the reason it rolls through a standard door without anything being taken apart.
For a useful reference point, the U.S. Access Board’s guide to ADA entrances, doors and gates describes a 32-inch minimum clear width for accessible doorways, measured from the stop to the face of the door when it’s open 90 degrees. A cabinet 29 inches deep has room to spare through a doorway built to that standard.
Doors are rarely the problem. The route is. Tell us about anything between the curb and your corner: steps at the entrance, a tight turn in a hallway, a narrow vestibule with two sets of doors, a freight elevator, or a back door that opens onto a loading area. We plan delivery around those details so install day is uneventful. Our photo booth install post walks through what happens on the day itself.
Photo booth dimensions are half the job. Placement is the other half
A booth that fits but sits where nobody sees it won’t do much. The booth is the attraction, so it needs to be seen. People make a deliberate trip to a booth and return with friends in tow, but only if they spot it to begin with.
Placement tips that hold up across venue types
Aim for a corner that’s visible from the entrance or from the main gathering area, close enough to the action that people wander over but not so close that a line blocks your bar or host stand. Pick a spot near an existing outlet so no cord crosses a walkway. Avoid putting it directly in a main traffic lane, beside a restroom door, or anywhere a waiting group would crowd a fire exit. Lighting in the room matters less than you’d think, because the booth has its own flash inside the enclosure.
What that looks like in real spaces
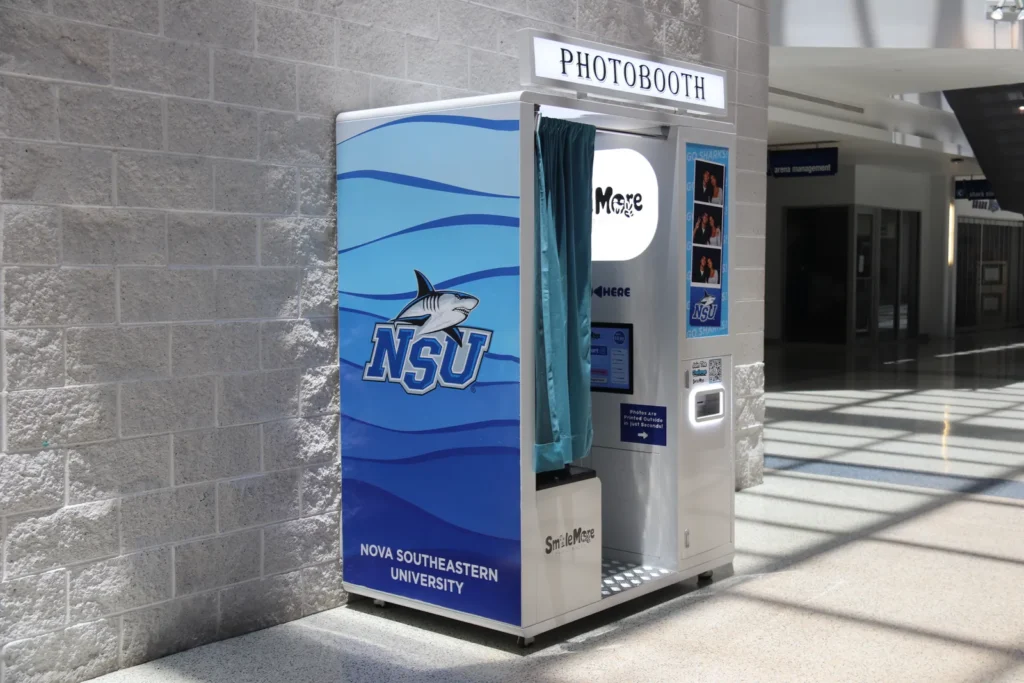
In a bar, it’s often the corner near the end of the bar or the edge of the lounge. In a restaurant, a spot near the waiting area or the entrance to the patio tends to work. In a hotel, a lobby corner or the area outside a ballroom can work; our post on Florida hotel amenities covers that setting. On campus, our first live booth stands in the Don Taft University Center lobby at Nova Southeastern University, a spot students pass between classes. You can see that spot on the NSU booth page.
That NSU placement taught us something about flexibility, too. Facilities required that the booth be movable, so it stays on its casters and we handle relocating it, not the venue’s staff. If your layout changes for events, we can plan for that.
Measured a corner that might work?
Send us the spot. If it fits, the booth goes in free and a share of every session goes to you.
Power and the rest of the setup
Beyond the photo booth dimensions, the setup asks for very little: one standard outlet. It takes cards and phone taps on its own, which means no cash box and nothing for staff to operate. Service is on us too: remote monitoring, in-person restocks, and same-day fixes from a local crew in most cases. The booth, delivery, install, paper and repairs are all on us, and we insure it.
Hosting comes with a 12-month agreement and a 90-day trial. Ninety days in, if it isn’t paying off for you, it leaves free. Hosting pays you a percentage (10% to 25%, fixed in the contract before you commit), deposited monthly on the 1st with a sales breakdown. Thinking about owning one instead? The photo booth for sale page covers the Classic for buyers, and the guide asking whether a photo booth is a good investment lays out the tradeoffs.
Space questions we hear before installs
How close does the booth need to be to an outlet?
Close enough that the cord never crosses a path people walk. We look at outlet locations during review and plan the corner around them.
Can the booth be moved after it’s installed?
Yes. It sits on casters, and we relocate it when needed rather than asking your staff to. Just let us know before a layout change.
Does the booth have to go against a wall?
A corner is usually the easiest fit because it keeps the booth out of traffic, but what really matters is visibility, clear walkways and room for guests to gather. We’ll suggest options when we see the space.
Will the booth fit through a double door or a side entrance?
Usually, yes. Its 29-inch depth is what passes through the doorway. Tell us which entrance we’ll use and about any steps or tight turns on the way in.
Here’s our commitment: measure your corner, snap a photo from a few steps back, and send both through the space check form. We take projects as they come, and spots are limited, but every space gets a straight answer on whether the booth fits and where we’d put it.